Speaker Mounting Guidelines and Best Practices

The way a speaker is integrated into a project can make a stark difference in the quality of the output, regardless of the quality of the speaker itself. An excellent speaker may underperform in real-life situations, leaving much to be desired, whereas a low-quality speaker, if optimized effectively, might at least meet expectations and sometimes even exceed them. From usable volume to proper resonance, the art of mounting speakers is a crucial yet often underestimated skill. Whether this speaker will be integrated into a small, portable electronic device or a large, mission-critical platform, the process for achieving optimal sound demands careful consideration.
Even before selecting the speaker, it’s paramount to fully understand the environment that the end product will be used in. Will it be used in noisy environments where the most important aspect will be that it is heard at all? Or in quiet environments where the goal is to achieve perfect reproduction of the source sound? Will it need to be portable? Do you know where the end user will be in relation to these devices? As a result of these questions, you will get a better idea of what frequency response you need, what volume levels are expected, as well as restrictions on power consumption, weight, material types to be used and more. These questions and their answers will not only narrow the selection of the speaker type to be used but also provide considerable insights on how it will be mounted. Upon selecting a specific speaker, best practices and advice in the datasheets can be found from most quality manufacturers. Same Sky’s wide selection of speakers can be viewed here.
Our blog post, All You Need to Know About Speakers in Audio Design, also provides a good overview of key speaker specifications, cone materials and magnet types, and much more to aid in device selection.
Speaker Mounting and Termination Styles
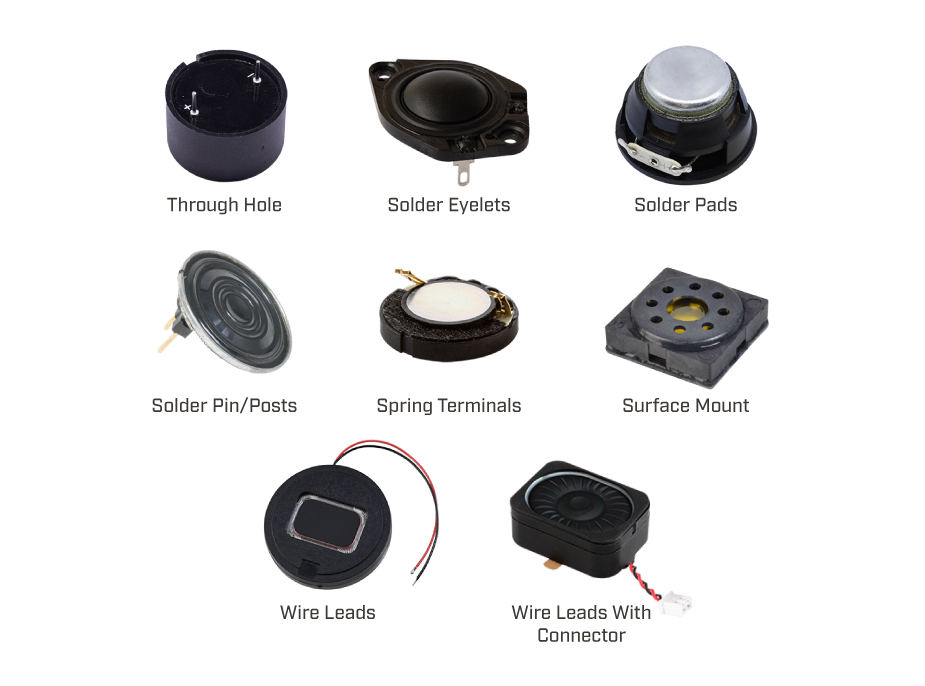
Speakers often come with termination options such as wires, solder pads, spring contacts, surface mount terminals, and through hole terminals. Regardless of the termination, the outer frame of the speaker is typically mounted directly to the enclosure wall. This is usually achieved by mounting holes that screw directly into the enclosure, or by gluing the frame to the enclosure. In either case, a good seal between the speaker and enclosure wall is required to help prevent air leakage.
On parts that come with wire leads, the wire leads are routed as needed for the electrical connections. Speakers with solder pads need wires to be soldered to the pads and then routed as needed similar to their wire lead versions. A common misconception of speakers with solder pads is that they are soldered directly to a PCB. These are NOT surface mount parts that get soldered directly to a board, but rather require wires to be soldered to the pads.
Spring contact versions use pressure from the assembled enclosure to hold the speaker into place and make contact with the terminals. There should be no soldering required on the spring contacts, which allows for easier replacement. Versions that have surface mount terminals specifically designed for reflow soldering can be soldered directly to a PCB. These will often come in some sort of self-contained enclosure, so they may not require mounting directly to the outer enclosure. Like the surface mount versions, speakers with through hole pins can also be soldered directly to a PCB. The overall design requirements will help dictate which mounting and termination option is best for the application.
Speaker Enclosure Design Considerations
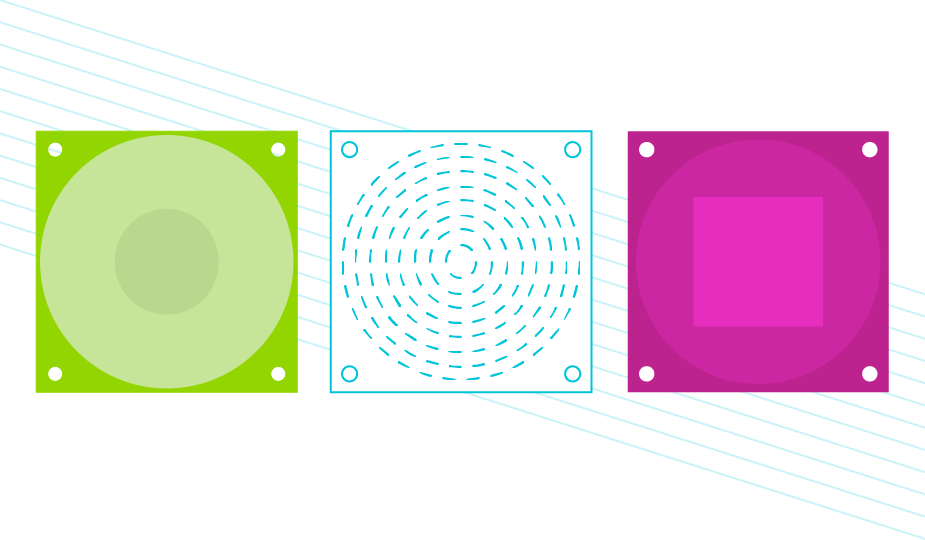
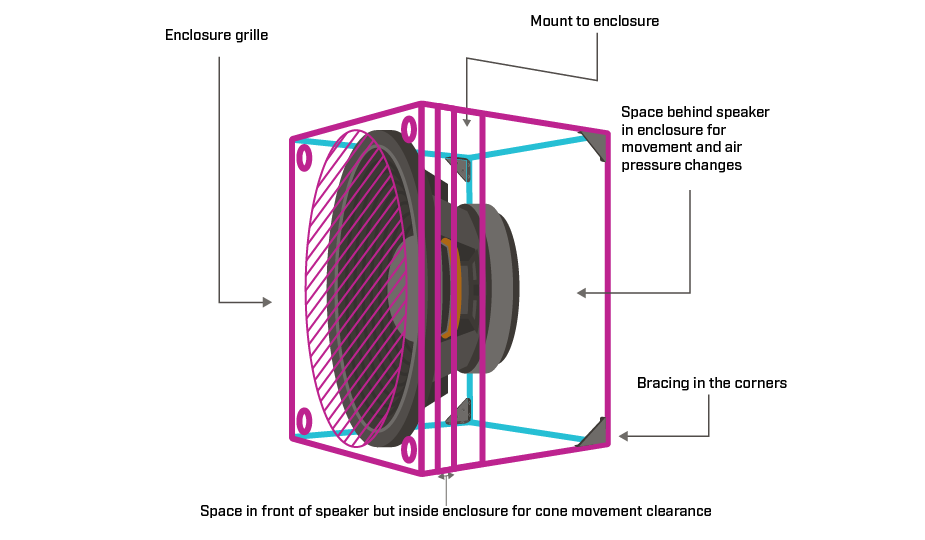
Cavity space, both in front of and behind a speaker, can affect the resonance and drive of a speaker. The front cavity serves as both a conduit for sound and, when necessary, a protective barrier that shields the speaker from its environment. The front cavity can be protected by a thin mesh or screen, but if there are environmental concerns of items coming in contact with the speaker itself, a protective rigid plate with holes or slots can be used. A few cuts in the plate allow sound to propagate with minimal sound attenuation, even with up to 80% coverage of the speaker itself. When placing that front plate or mesh, care must be taken to give the diaphragm room to move in and out as it is actuated, which depends significantly on the size of the speaker. For micro speakers, it is generally around one to two millimeters of clearance. More details on how to best mount these micro speakers can be found in our other blog, How to Design a Micro Speaker Enclosure.
Many smaller speakers need a balance between being compact and delivering quality performance. Constructing a rear cavity depth about equal to the diameter of the speaker is a good approximation for mini or micro speaker applications. For larger speakers, the back cavity is an even more crucial decision as the movement of the speaker will cause pressure differentials in the back cavity. If the cavity is too small, the pressure changes become larger and actively fight the movement of the speaker. The front and rear cavities should be separated with a tight junction, while adequate space in the back cavity will reduce the amount of air trying to escape through that junction. That tight junction not only seals the front and back cavities but provides a physical mount for the speaker itself. As a speaker is a very physically active component, a tight mount using high-density foam in the seal is the most common approach to ensure that the speaker does not buzz or rattle when in use.
Speaker Mounting Materials
With a properly mounted speaker, there should not be any buzzing or unwanted movement. However, this is also dependent on the mounting material itself. With many new products, thin plastic is used, and this may flex and vibrate as well. It is best to choose a material and thickness that is sturdy and will not be moved or resonate with the speaker. Internal bracing of the product (shown in the image above) may be necessary depending on the anticipated loudness of the speaker and the rigidity of the enclosure.
Final Design Considerations and Testing
For many engineers, the aesthetic aspect of a project is, at best, an afterthought. However, it is important to either take the visual and functional interface into consideration or work with a designer who specializes in it. When deciding on speaker placement, mounting method, or even protective covering, it is essential to think of how it will appear to and interact with the end user. If it is not visually appealing in addition to being highly functional, customers will not be as inclined to purchase the end product. It needs to be as eye-catching as it is acoustically optimized.
Finally, after much consideration, planning, and design, it is important to do some practical testing. As soon as possible within the design process, a prototype should be created that tests out some of the concepts and ensures that they work as planned. Perform listening tests and measurements to evaluate the sound quality and make necessary adjustments. It is important to use measurement tools like microphones and frequency analyzers to finetune the speaker's performance and, where necessary, characterize the expected performance. Changes in structure, mounting, and placement may all be significantly modified at this point, so it is best to make major changes before refinement is performed. However, a change in these items is not required for an increase in performance. For example, if there is too much resonance within the enclosure, damping materials could be used internally to the device itself to reduce or eliminate the problem.
Conclusion
The way that a speaker is mounted in a device or in a dedicated enclosure will significantly affect its performance. By thoughtfully going through the process of identifying needs, implementing best practices, and verifying desired performance throughout the process, the selected speaker will live up to its design specifications and yield the best results. When it comes to selecting an audio solution, Same Sky’s diverse offering of miniature speakers and standard speakers as well as our audio design services are here to help!
