Understanding Audio Jack Switches and Schematics
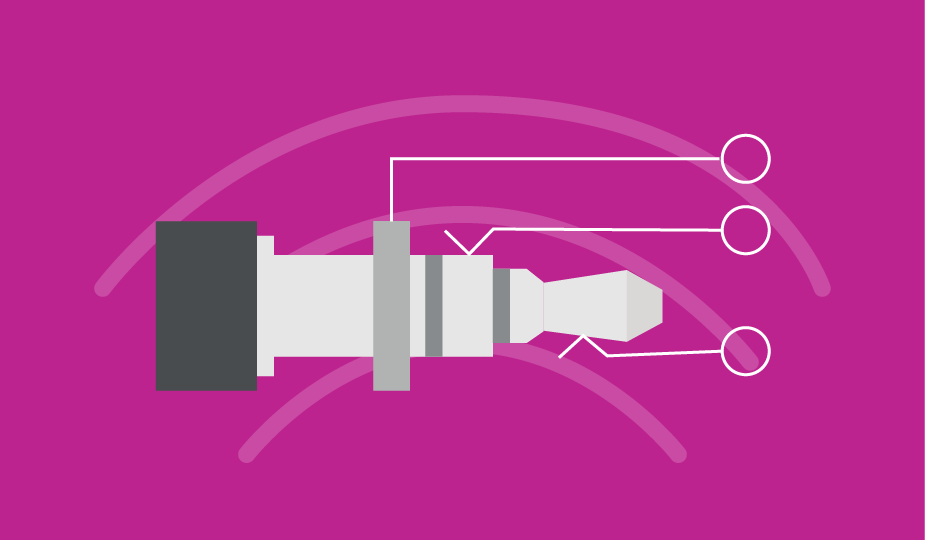
Audio jacks have been around for decades and have been used in a wide variety of applications. While simple in their basic functionality, they can be used in complex systems. To better understand some of their capabilities, we will dig into the "guts" of these connectors and see what they have to offer. When looking at a seemingly simple audio jack datasheet, you will often find an array of schematics with a variation of switches and connections. In this post, we are going to look at how to read these schematics, describe the various switch types available, and discuss how they are implemented in audio applications.
What is a Switch?
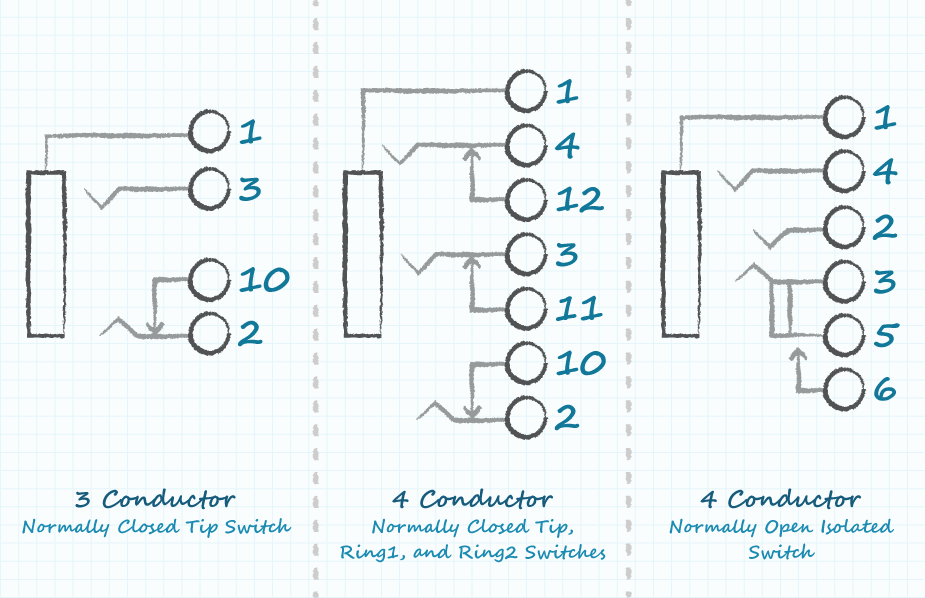
At its basic definition relating to electrical connectors, a switch is a device for making and breaking the connection in an electric circuit. Audio jacks are available without switches, with simple switches, or with complex switching systems. These switches are often represented in a schematic for the connector available on the datasheet. Below are some typical schematics that show some of those switching options.
How to Read an Audio Jack Schematic
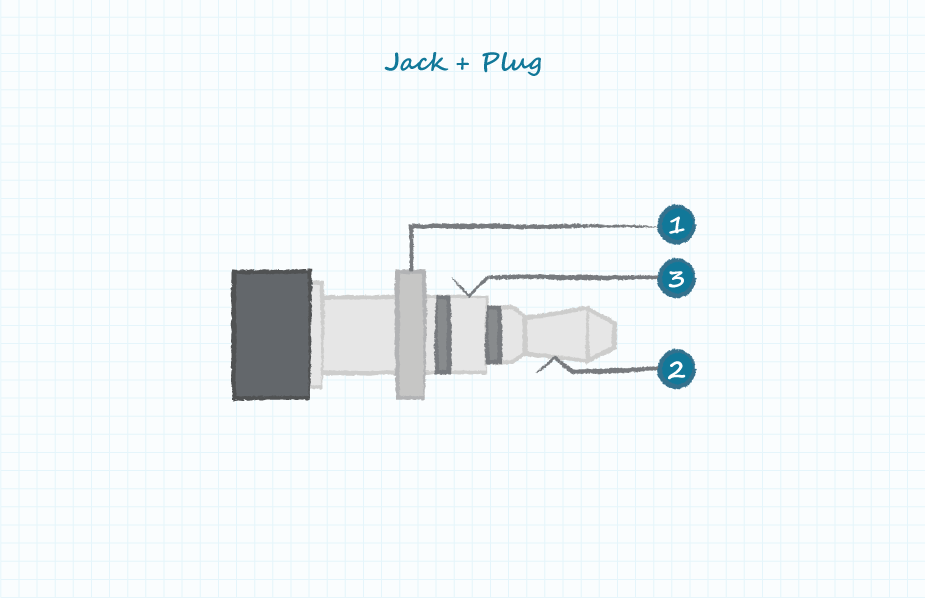
Before we get to the switch function, first we need to understand how to read an audio jack schematic. Audio plugs can come with as few as 2 conductors up to 6 or more conductors. For this example, we will focus on the standard stereo connector with 3 conductors. Below is a plug diagram and basic schematic including the typical terminal designations. This specific example does not include switches.
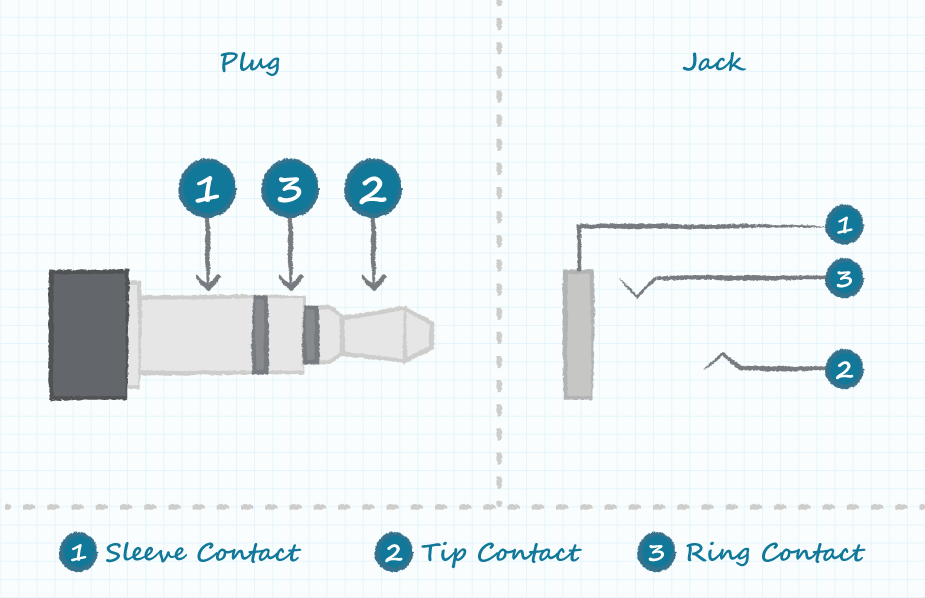
When reading the schematic, think of the plug being inserted from left to right to align with the respective terminals of the mating jack.
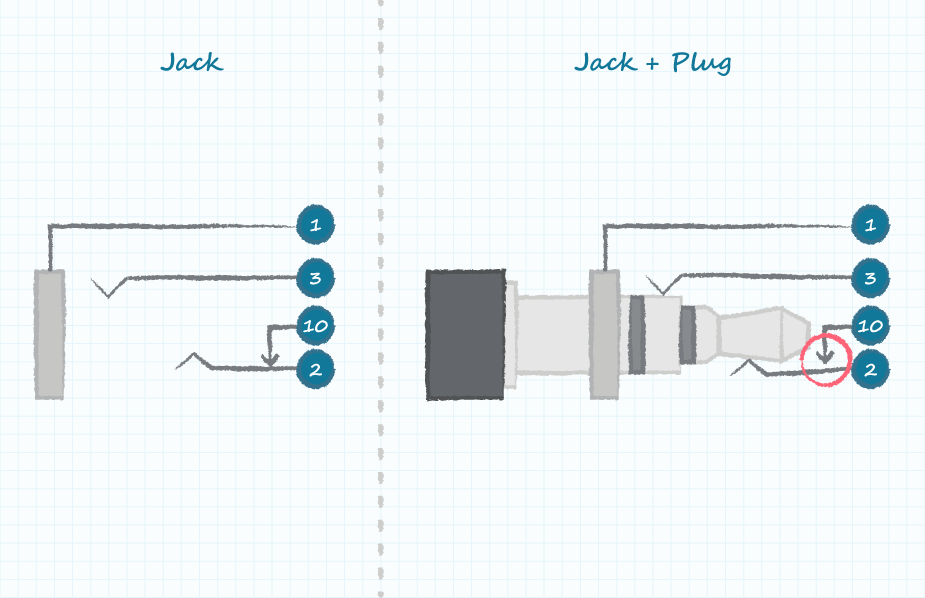
Now, we are going to add a switch to the terminal 2 position (tip). The switch on the left shown below, is classified as normally closed because in the un-plugged state, terminal 10 is making direct contact (closed) with terminal 2. It would typically be referred to as a "tip switch" since the switch is located on the "tip" terminal. Now again, we visualize the mating plug being inserted from left to right. When the tip makes contact with terminal 2, it pushes this spring away from terminal 10 making the contact "open" between these terminals.
In a similar way, multiple switches could be present on different contacts. Below is an example of a 4 conductor plug, with 3 switches located on the tip, ring 1, and ring 2 terminals.
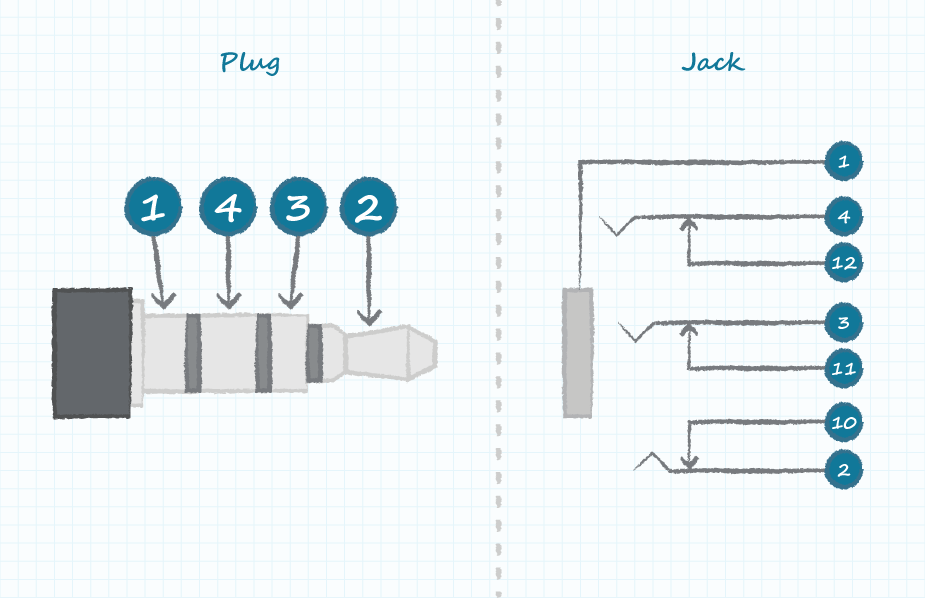
Even though this looks more complex, it is still has the same basic functionality of the single switch variation, except there are 2 additional switches present.
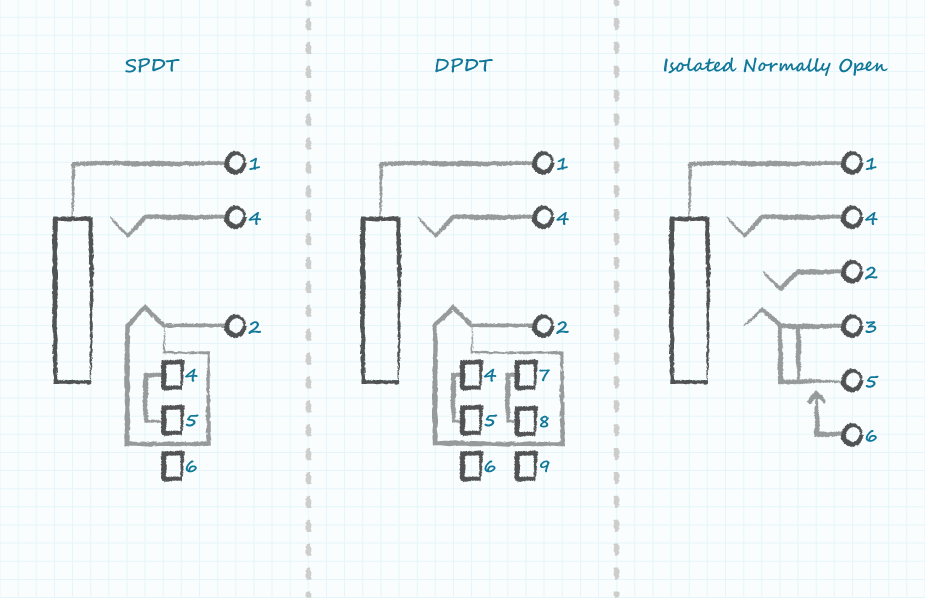
The switches that we have looked at so far have all been normally closed switches. Some other switching functions would be classified as normally open, Single Pole Double Throw (SPDT), and Double Pole Double Throw (DPDT). Many of these switches would be isolated from the audio signals and could be used to control other portions of a circuit.
Are Audio Jack Switches Needed?
The application dictates how many and what type of switches are needed. If you are simply plugging your headphones into an MP3 player to listen to music, you would not necessarily need an audio jack with switches. However, if you are needing to switch the audio between speakers and headphones, detect when the plug is inserted, use the inserted plug to control other portions of your circuit, or are using an audio mixing board, you will likely want to use a connector with a switching function. The following are some conceptual examples that could apply to multiple applications.
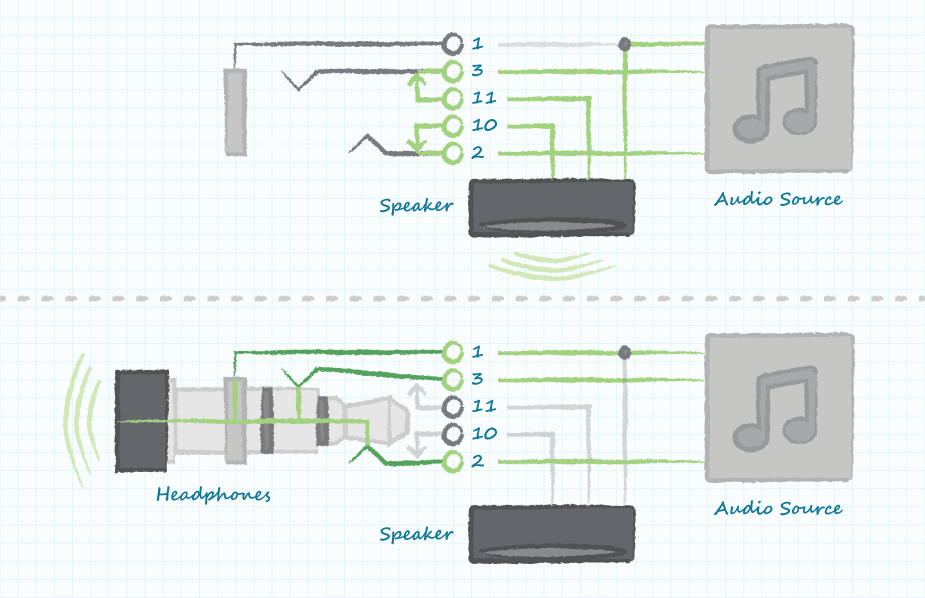
Switching Audio Between Speakers and Headphones
In the first figure, the plug is not inserted, so the terminal 10 and 11 switches are closed routing the audio to the speaker. In the second figure, the plug is inserted which opens the 10 and 11 contacts thus routing the audio to the headphones.
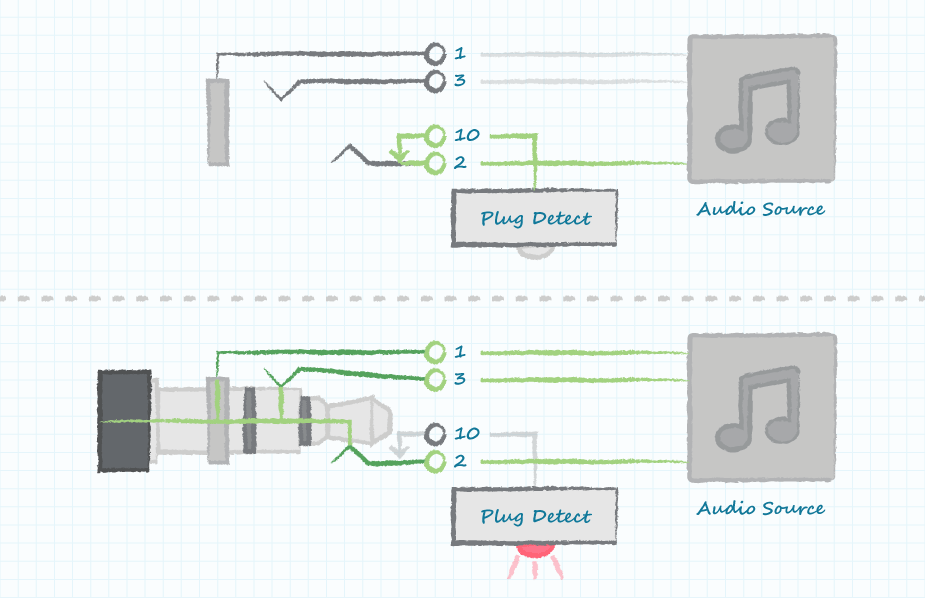
Detect When the Plug Is Inserted
In a similar manner, this setup would engage a detect feature when the terminal 10 contact is opened by inserting the plug.
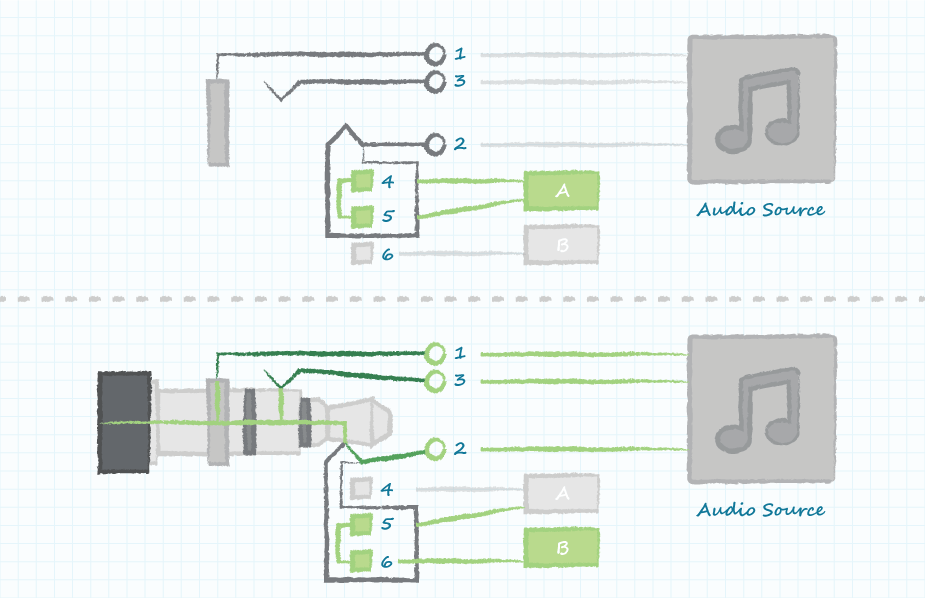
Controlling Other Portions of a Circuit Independent of the Audio Signals
In this example, terminals 4~6 are electrically independent of the audio signals 1~3. This utilizes a SPDT switch in which terminals 4 and 5 are connected in the un-plugged state, and then terminals 5 and 6 would be connected in a plugged state. This could be used to switch between circuit functions "A" or "B" with the inserted plug.
By understanding how to use the various switch configurations within an audio jack and their function, you can utilize these interconnect devices in a wide array of applications to perform tasks of varying complexity.
